Do’s and Don’ts of Grouting Tile
Grouting can be a gratifying task – it’s the last step and a sign you are almost done with your project! It will bring out the beauty of the tile and your entire project together. However, if you’ve ever had grout turn rock hard before getting it off the tile, you know that grouting can be tough. In an effort to help you avoid problems and get the best results, we’ve created a handy list that walks you through the do’s and don’ts of grouting tile.
Whether you are looking to complete the tile floor in your bathroom, or a new backsplash in the kitchen, here are some tips to abide by when working with grout:
Do’s: How to Grout Tile
Do – clean everything before you begin: Remove any dirt and stains, and repair any cracks before beginning your project.
Do – remember to let it slak: After remixing the grout, let it set for 10 to 15 minutes. This is known as “slaking.” Then, assess the tile grout to see if it is too thick. You may need to add a little water to make the mixture thinner.
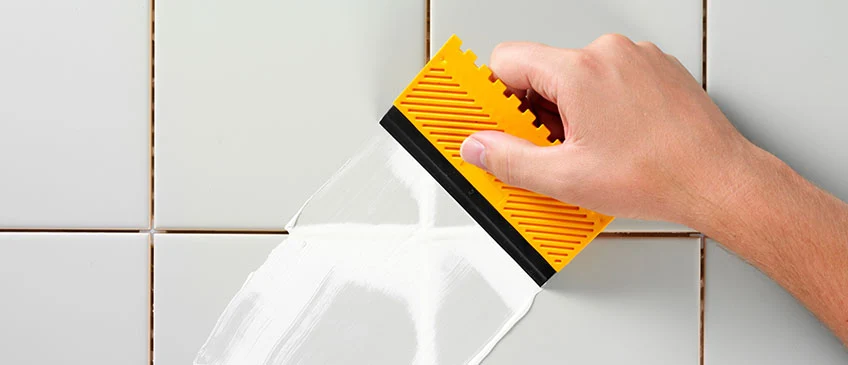
Do – force it into the joints: When grouting tile, fill in the joints by pushing grout at a 45 degree angle to the joints with a float. Start in one corner and work your way throughout the entire tile. Make sure all the joints are filled, then, remove any excess product from the face of the tiles by holding the float at 90 degrees to the tile and scraping it off.
Do – remove extra before caulking: You’ll need to remove any grout from corners before caulking. This includes inside corners, next to baseboards and walls, and inside your tub. Using a utility knife will be the most effective way to remove any tile grout from these hard to reach areas.
Caulk is important because it acts both as a sealer and an expansion joint. It adapts easily to changes in weather, etc. Learn more about caulking like a pro.
Do – routinely clean it: Every so often, you’ll want to clean your grout because it will become stained with oils, mildew, or algae. Home improvement stores usually sell tile-and-grout cleaner which should be able to do the trick.
Don’ts: Avoid these Grouting Nightmares
Don’t spread too much at once: When applying tile grout to the wall, scoop it from the bucket with your float and apply it to the wall in upward strokes. Work in 3 x 3 areas to ensure that the grout doesn’t harden before you are able to work it into the joints. Finish grouting, shaping the joints, and cleaning each section before moving onto another small section.
Don’t forget to seal porous tile: Before beginning your project, remember to spray sealer on your floor tile. If you don’t seal porous tile or stone, the product will stick like glue and be impossible to clean off. Follow the directions on the label then wipe up any excess sealer to avoid any puddles. Before you begin your project, let the sealer dry completely.
Don’t scrub too hard: Scrubbing, or using too much water, right after application is one of the biggest mistakes DIY-ers make. Before wiping off any excess product, let the grout harden and then test it with your finger. Scrubbing the wall will be ineffective as it just moves the product around, instead of cleaning it effectively.
Instead, you’ll want to use a damp, not soaking wet, sponge to clean the entire area in long, continuous strokes. You may notice some left over “grout haze” about a day after your application, but you can buff this out easily with a soft cloth.
Don’t forget the necessary tools: Before starting your project, make sure that you have all of the necessary tools. This includes a bucket, float, utility knife, sponge, and soft cotton rag. You’ll also need grout mix, caulk, and tile sealer ready ahead of time.
We want to know: What do you find the most challenging about your grouting project? Leave us a comment below!