How to Tile a Backsplash
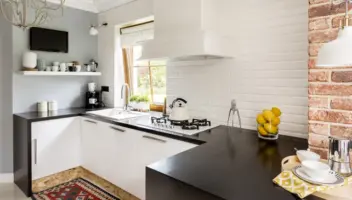
Adding a tile backsplash to your kitchen can add life to you kitchen. It can showcase your style, add visual interest, and a bit of color to your space. You can choose from a variety of different styles, such as mosaics and subway tiles, and a bunch of different materials, including porcelain, glass or stone. If you are looking to install tile over drywall with tile adhesive, follow our step-by-step process below.
Materials for Tiling a Backsplash
Before you start diving in to your project, make sure you have these tools and materials on hand:
- Drill/driver with mixing attachment
- Tile-cutting hand tools
- Grouting sponge
- Wall tiles of your choice
- Tile adhesive
- Grout
Prep for Installation
As a safety precaution, turn off the power to your kitchen and remove outlet covers and switch plates. Tape off outlets, cabinets and the area where your countertops meet the walls. Move any freestanding appliances away from the walls and out of your workspace. This first step is imperative before beginning any work.
If you are tiling over painted drywall, you can use course-grit sanding sponge to rough up the surface. This will help mastic will adhere better to the wall.
Lay Out the Backsplash
If you’ve worked with various tiles before, you may realize that wall tiles are a bit thinner and lighter than floor tiles. Additionally, many are made with built-in spacers on their edges, known as lugs. If your tile does not have lugs, be sure to get the proper size plastic spacers. Spacers are important to maintain the proper gap in between each of the tiles. They also prevent the tiles from slipping downward before the adhesive sets.
Check to see if your countertop is level. If not, you’ll need to stand a tile at the lowest spot and mark a level line on the wall at the tiles top. This will be your starting point.
To ensure your layout is symmetrical, measure and mark the center point of each area before being tiled. You can lay out your tiles by lining up the edge of one tile with the center mark and place the tiles side by side to determine how many tiles will be needed and the width of the end pieces. This is referred to as “dry-laying” the tiles and will allow you to adjust the layout accordingly before attaching the tiles to your wall.
Remember, you’ll also need to take into consideration any electrical outlets, pipes or other obstacles, when laying your tiles.
Cut the Tiles
When you dry lay your tiles, you’ll be able to see where they need to be cut. Cut the tiles accordingly to fit in your desired space. You should cut the bottom row and end cuts before apply the mastic.
You can use a manual snap cutter for most ceramic and porcelain tile. For glass, you’ll probably want to use a power wet saw, as it will provide a smoother cut.
Working with Mastic
After you have planned for laying the tiles, and cut the pieces accordingly, you can now start to apply to the mastic.
Wall tile adhesive comes pre-mixed or in powder form. When working with the power mix, add water until it forms a thicker consistency.
Next, apply the mastic with a trowel. Spread the mastic starting at the center mark and working up to the horizontal reference line. Use the notched sides to create ridges.
If you are working with glass tile, be sure to choose thinset or adhesive for glass tile, since it may show through.
Pro Tip: Tile adhesive dries quickly! Work with a small area to ensure the tile does not dry while you are using your trowel. We estimate that it takes about 15 minutes to dry. There are also peel and stick tile adhesive products on the market, which can make laying tile a bit easier.
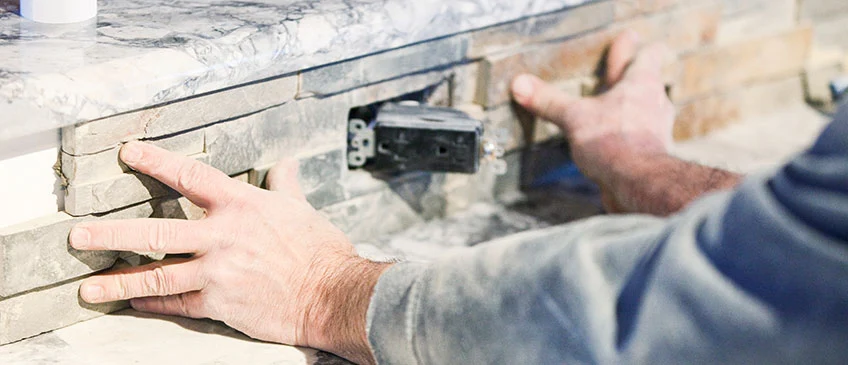
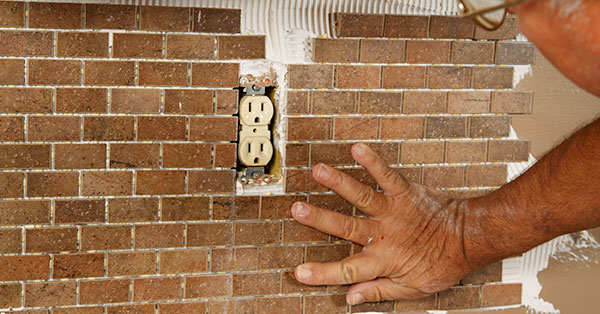
Lay the Tiles
Working quickly, start laying the tiles onto the mastic. If you have a vertical border, start there and remember to add a spacer to the bottom to allow room for caulking. If you do not have a border, begin with the bottom row at the center and press the tiles firmly into the mastic.
If corner pieces must be cut to fit, do not set them in place just yet.
After the first row of tiles is complete, move on to the second row, and so on, until your entire area is covered. Before moving on to the last step, let the tiles set for 24 hours, or as the manufacturer recommends.
Grout
Use a mixing attachment to mix the grout on a low speed until it thickens up. Remember, grout can dry out, so mix only what you will be using in the next 20 minutes.
First, start by wiping down the tile with a wet sponge to ensure you clean all of the dust. Remove the plastic spacers and apply grout with a rubber float working diagonally across the tile. Holding the float at a 45 degree angle will ensure that you get the grout into the seams. Use a damp sponge to wipe off the excess, wringing out the sponge frequently to ensure that it isn’t too wet. A soaking wet sponge will weaken the grouts bound.
If there is grout haze left on the tiles, use a commercial release agent to clean that up. After waiting a few days, apply a silicone sealant. You can now replace your outlet covers.
Completed Tile Backsplash
Voila! Your new backsplash is finally finished! We hope you enjoy your backsplash and your new kitchen area where the entire family can find time to relax and spend time together. Let us know how your project turned out by commenting below! We’d love to hear from you.