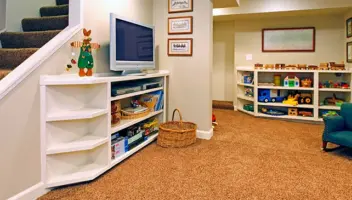
Finishing My Basement – Part 1
Finishing a basement is no easy task. It takes careful planning, a lot of research, and a good amount of money to do it right. But, in the end, it’s all worth it. In this 3 part series, we’ll dig into some important information you should consider when finishing your basement. So the question arises, “What do I need to think about when it comes to finishing my basement?” Well, just like with any home improvement project, your results may vary, so make sure you do the necessary research before taking on such a large home improvement project.
Step 1: Plan Your Project
The first step to any major home improvement project is to research all that is needed to complete the project. This includes researching contractors, sub-contractors, permits needed, potential layout of the space, funding, etc. Having a good idea of what the project will entail will help you plan your project and not be taken advantage of or be left holding the bag when something goes south and you need to rely on your contingency plan(s).
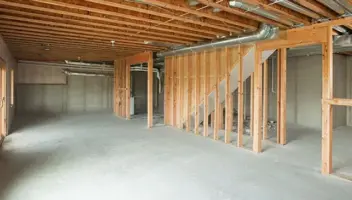
When you finish your basement, there are many things to consider: Do you add a bathroom or half-bath? Kitchen with bar area? Spare bedroom? All of the above? So where do you start? I started by measuring my basement and drawing a rough sketch in order to get a basic shape of the space. My basement is somewhat rectangular with the staircase right in the middle (somewhat inconvenient, if you ask me). This left me with a sort of L-shape room, with another work room area off of one side and a back storage/HVAC room.
Since our basement was not roughed in for a future bathroom, we needed to decide if adding a half-bath to the space was really necessary, as it adds a considerable amount to the overall cost of the project. In the end, we decided that if this was going to be a gathering place for our family and friends, having that extra bathroom would be a good thing, as well as the increase in value of the home at resale.
Once we had a basic layout of the space, it made it so much easier to talk to contractors about our “vision” and what we wanted, as well as helped them be able to remember all that we had talked about when we met with them. I would print off the layout and give it to the contractor at the time of the walk-thru, and they could take notes on the drawing itself.
Step 2: Selecting a Contractor, Project Cost & Funding
When looking at the overall cost of finishing a basement, it really does vary based on geographic location and the price of the contractor. That is why I highly recommend getting quotes from multiple contractors. A good rule of thumb for pricing is by going with a contractor, you can expect to pay anywhere from $20/sq ft to over $30/sq ft. So, for a 1000 sq ft basement, your overall cost will be between $20,000 and $30,000. This can be a frightening price tag. And the difference between $25 and $30 a square foot could literally mean saving THOUSANDS of dollars on the overall cost of the basement.
Being somewhat handy myself, I wanted to have the ability to work with the contractor on projects that I could do myself and save some money. Being open to completing projects such as installing some basic flooring, putting up insulation, installing light fixtures, and painting can save you hundreds to thousands of dollars! And just think of the satisfaction you’ll have knowing you pitched in to help complete your basement renovation! But, you have to select a contractor that is open to this idea. Some contractors don’t want to deal with that because it slows their project timeline down, or something might not be done quite right by the homeowner and it caused the contractor to have to redo it correctly. Make sure that if this is something you want to do, that you talk to your contractors about it ahead of time and it is something they are interested in working with you on.
When you get the quote, ask questions about the costs. Most contractors will give you a total cost, and then a timeline when certain payments are due. The contractor I chose broke out the overall cost into 4 payments. One larger payment due at the beginning to lock in the crew, pay for a dumpster and to order and have delivered the initial material for the first part of the project. He also built in allowances for certain items: flooring, lighting, electric, HVAC, and plumbing. This allows me to know roughly how much I can spend on each, and if the quotes from the subcontractors is lower, I get that money back at the end. Maybe that elaborate chandelier you want above the bed in the spare bedroom doesn’t quite fit into the budget, but, maybe your allowance for flooring is higher than you need, so you can funnel that extra money into that lighting budget to cover it. Having allowances for each helps you to plan for what you can afford and what you really need in your space.
The other major piece of the project is funding. When you’ve got your final price and you’ve selected your contractor, now you need to figure out funding. Do you have a Home Equity Loan or Line of Credit you can dip in to? Or, do you need to go with an unsecured personal loan? What about savings? Paying for things in cash is always a great option if you can afford it. Whatever your situation is, make sure you have enough cash to cover the FULL price of the project, plus about 10% for any contingencies or issues you may run into.
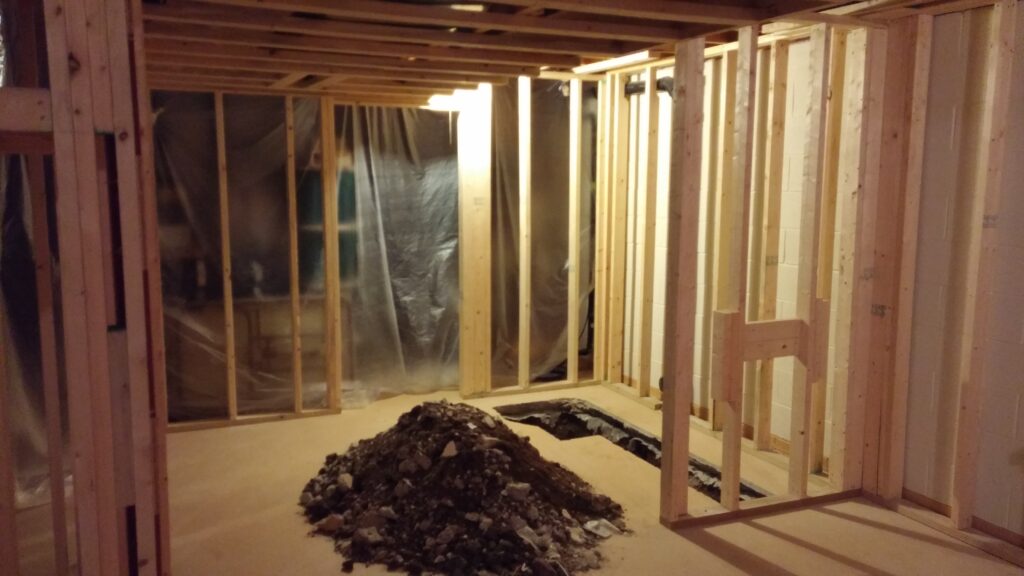
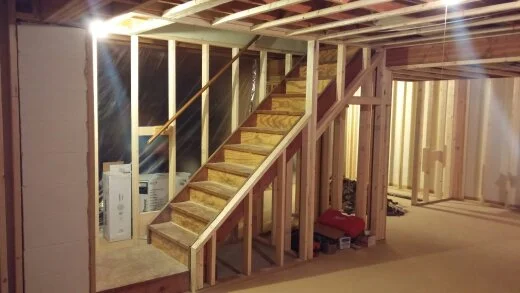
Step 3: Framing
Once you’ve hired the contractor, set your timeline, paid the initial costs to have the project started, the first thing the crew does it frame out the space. Building your walls, soffits, closets, etc. and giving you an initial idea of what your final finished space will look like. For me, this step was incredibly satisfying. I really got to see if my vision of what the space would look like will really work and if changes needed to be made. In my situation, since our space limited us in what we could really do, what we had drawn out worked great. But, your situation may be different. Maybe you had this grand idea for a walk-in closet, but once the bedroom walls were up, you realized there wasn’t enough space to have it. Or, maybe that elaborate bar you wanted to have would cause a weird traffic pattern or cause a headache for the plumber. Either way, finally seeing walls go up can really help you visualize your space.
Well, that’s it for Part 1. of “Finishing My Basement”. Read Part 2 here, which focuses on electrical, plumbing, and drywall and all that comes with that!