Flower Bed Edging
Flower bed edging serves so many purposes, it is truly a worthwhile investment for your home! A garden that has not been edged is vulnerable to erosion and grass overgrowth. They can also become quite an eyesore.
The good news is, by adding garden edging, you can prevent these issues, add a little personal touch to your garden, and make your home’s exterior look incredibly beautiful!
That all sounds great, but are you scratching your head, wondering how to tackle this landscape project? With these simple tools and techniques from the LeafFilter team, you’ll have beautiful flower bed edging in no time!
Step 1: Make a plan and pick your edging
The first thing you’ll need to do is decide whether you like the current shape and layout of your gardens. When evaluating your landscaping, consider whether your garden is easy to mow around, if it’s visually pleasing, and if your plants seem to need more room to spread out.
If a garden is hard to mow around, consider extending it to the edge of your yard or softening the angles to make this chore a little easier. If your plants need some space or your current layout just doesn’t look right, consider re-shaping your garden before you edge. It is a good idea to sketch these ideas out on paper so that you can visualize how the completed project will look.
Whether you decide to re-shape your gardens or not, you’ll need to measure to see how much edging you’ll need to complete your project. You can use string, twine or a garden hose to precisely go around curves, and then measure the length of string for an exact measurement.
Once you’ve got your plan and measurement in hand, you can purchase (or salvage!) your desired edging. If you go to your local home improvement store, you’ll see an array of flower bed edging options like brick, stone, wood, metal, and polyvinyl. However, if you’ve got a creative streak or your landscape design is slightly eclectic, you might opt to use other materials like glass bottles, fine china plates (although we recommend using plates that have been chipped or cracked!), copper pipes, rope lighting, and more. If you can’t narrow it down, check out our Pinterest board for tons of awesome flower bed edging ideas!
Step 2: Dig a trench
To prepare your garden for the edging, you’ll need to dig yourself a small trench. If you decided to re-shape your garden, spray paint the new borders, and follow that line as you dig. Otherwise, dig around the existing edge of the flower bed.
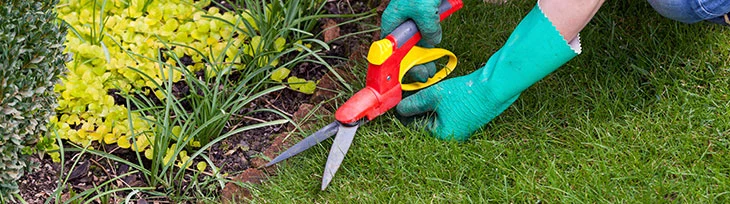
There are many different types of tools you can use for this task. Hand tools like spades, half-moon edgers, and step edgers are all effective, but they do require a lot of physical endurance and strength. It may also take more time to complete your trench using these tools. However, you do get a lot of control with hand tools, and can see exactly where you’re cutting before you make a mark.
Your other options are electric- or gas-powered edgers. These edgers are much easier to handle, physically, as they put less strain on your back and shoulders. They also make this task a lot quicker to tackle. Unfortunately, gas-powered edgers aren’t exactly eco-friendly. So, your best bet is probably an electric edger. Just be aware of the cord at all times so that you don’t cut through it!
Additionally, we suggest having a wheelbarrow handy to toss the excess dirt into as you dig the trench. You’ll be able to wheel the leftover soil to low spots in your yard or gardens that have lost a little volume.
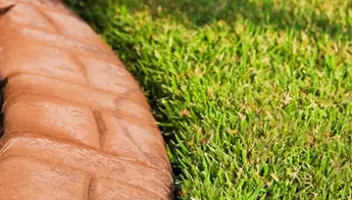
Finally, when digging your trench, make sure to pay attention to the width of your flower bed edging. If it is a skinny edge (like the nearly invisible metal edging), you need to cut very little before installing. However, if you’re using a wide stone or brick, you’ll need to dig a trench at least that width to allow for enough room. Typically, a trench should be around 8 inches wide and about 2-3 inches deep (depending on the height of your edging).
Step 3: Put down weed blocker, and base layers of crushed rock and sand
For thinner edging, like china plates or metal fencing, you can skip this step altogether. However, if you’ve settled on stone, brick, or other large materials, this step may be the most essential of all.
Placing weed blocker under your edging will be a huge lifesaver in the long run. Pesky weeds and stubborn grass will grow between stones, bricks, and other popular types of edging. This can become a huge eyesore, and the tight spaces between the pieces of edging can make these unwanted visitors very hard to pull. Save yourself the trouble up front by cutting appropriately sized strips of weed blocker (approximately 2-4 inches wider than the width of your edging, and however long your garden’s border measures) and snugly lining the trench with it.
Then, if you’re using stone, brick, wood, bottles, or pipes, you’ll want to lay out about an inch of crushed rock on top of the weed blocker, and sprinkle a thin layer of sand on top of this. This will secure the weed blocker and act as a stable base for the new edging to nestle into.
Step 4: Place your new flower bed edging
Here it is! The step you’ve been waiting for! It’s finally time to edge your flower bed. Depending on the type of edging you chose, you might want to be careful not to strain your muscles. Wearing braces on your back, wrists, and/or knees can ease some of the strain of the repetitive motion of lifting and dropping the edging. Also, remember to lift with your legs, not with your back. If your muscles begin to feel strained, make sure to take a break and stretch regularly!
Set each piece approximately where you think you’d like it, but don’t secure it into the base layer. This way, you can always move it around if you’re not content with how it looks at first. Once you figure out where each piece will go, you can then begin securing it into the base layer.
When placing the flower bed edging, make sure to wiggle it into the sand a little bit to make sure you have a secure base. You can even tamp the base layer down even more by lightly stepping on it or pounding it with a rubber mallet. If you’re creating a tall stone edge, be sure the edges nestle into one another so that they stay in place and won’t fall down. You’ll want to use a level as you go along to make sure your edging is at a consistent height.
After your flower bed edging is secured and level, you can finally sit back, take a sip of lemonade, and enjoy your garden!
Step 5: Maintenance
Over time, your flower bed edging may shift around or get dislodged. Every year, at the beginning of the growing season, you should evaluate whether you need to do a little routine maintenance to get your edging in tip top shape. Since all the hard work of digging the trench and placing the edging has been done, you’ll typically just need to edge around your flower bed to make sure the grass is far enough back that it won’t overtake the edging.
If you find that some of your edging has sunk over the winter, you may have a low spot in your yard where the dirt has settled. You can remove the edging in this area of your flower bed, fill with a little more crushed rock and sand until it is level with the rest of the garden, and then follow step 4 to re-set your edges.
Flower bed edging is a relatively low cost way to get your home looking fresh and welcoming. Follow these five steps, and you’ll be on your way to enjoying perfectly edged gardens in no time flat! You can rest assured you won’t have to deal with a lawn that’s always creeping into your gardens, or an overflowing flower bed that looks messy and more than a little unsightly.
And, best of all, edging your gardens can boost your curb appeal and have a positive impact on your home value! So, if you’re getting ready to put your house on the market, this should definitely be on your to-do list!
If you haven’t edged your gardens yet, what type of edging appeals to you most? Do you lean toward the traditional stone edges, or the more eclectic types, like rope lighting?
Or, if you’ve already edged your gardens, what other tips do you have to make this landscape undertaking a little easier?